I saw an idea for this in a magazine and fell in love. Yet I don't really have a reason to make yet ANOTHER apron for our home.. so when I saw the idea, i thought of a blogger friend. So, late one Saturday I found myself making this rather than getting the college homework done.. this is way more fun!
I decided to make it a tutorial after I started. and it was late. so forgive me :).
Start off with a button-up shirt. The ideal size would be large so that you have enough space to work with
flatten both front and back and use pins to keep the two layers stationary when cutting.
Then cut up the sides to make the apron shape, angling the top and then cutting the neck area.

I took the long-cut and cut twice.. so i've simplified it to cutting once... You might just like cutting straight across the top without including the neck because that got a little complicated later on the game.
Then get embelishments! Well, these are actually the ties for the waist and neck..
I "eyeballed" two strips of grosgrain that would be long enough to tie in the back..
Then another for the neck, with a small 3in for the other side to sew on 2 mini "D" rings.
Next, Pin the two pieces of the shirt to face inward because you'll be sewing the two layers together..
Also, take the waist straps and mark the apron so that they'll be equal for a waist-tie.
Now, stuff the ribbon into the shirt.. because you're sewing the "inside" of the shirt now and if you don't stuff the ribbon inside, you won't have straps!
See below? Does that make sense..?

Now sew! sew only around the edge til you get to the neck because you need to leave space to flip it right side out.
And you see how the strap comes out the side!? yep!
Now press the apron.
I added embellishments like eyelet fringe for the bottom.. I pinned it on the underside so that the fringe would just pop out the bottom :)
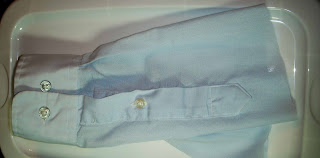
To be even more resourceful.. snip off a sleeve! (this was a long sleeve shirt) eventually making it large pocket.Then cut it in half
And add any embellishments you want to it...
I added pink ruffles of sorts..
And I wanted lace beneath the pocket.. so as I pinned down the pocket-- pleating it as I went.. I also pinned the lace down. Now when pinning down the pocket right now, you want the inside of the pocket to be facing you-- so that your seams are clean :). Then sew it.. Once you have the bottom sewn down, flip it up and start sewing the sides..
I got too excited to take plenty of pictures, sorry!
But once the pocket is added.. now to work on the neck.
Take your strip of ribbon (2-3 inches) and put one side between the two facing neck layers.. then thread the D' rings.. and bring the other side of the ribbon down to meet between the fabric layers..
Sew it..
Then on the other side of the neck, sew the long strap between the two fabric layers
Finished product?
Viola!
Suggestions:
Sew the large pocket a bit lower..
right now its fun because its a double-layer pocket.. small and large stuff can be stowed away.. while working in the kitchen. Cell and ... towel?
Anyhow. Have fun with this!!
--I don't think my purpose in life is to make tutorials because i'm not very concise..


That is so cute! Wow, you are so creative. Come stop by my Favorite Things Friday Party if you would like to join in!
ReplyDeleteThis is adorable and so creative! I'm visiting from Favorite Things Friday.
ReplyDeleteWow... that is the cutest thing!!! I know there are a few old mens shirts I could do that with. Very creative!
ReplyDelete